Friday, September 4, 2009

Bread

The entire summer, my energies have gone into making bread. I’m not a great baker; however, bread holds this sway over me. The act of baking seems so mysterious and fulfilling. A few years ago I worked in a cafĂ© adjacent to a bakery. Every morning the bakers would arrive at five a.m. and bake until two in the afternoon. It seemed rather Zen, waking up for the most hopeful and happy part of the day; kneading and rolling out dough; decorating cakes etc.

I have come to recognize that making bread is more about patience and long fermentation time than fancy techniques. I used to wing bread preparation, thus, the end products were always inferior. I was impatient too. I would make little balls of dough filled with crap and skip the rising bit. In most food avenues winging it has been helpful. Not alas, in sauce production; or dessert fabrication; pastry concoction or bread making have my improvisational skills always been of much use.

To understand why my breads never worked, I had to make bread exactly as outlined on the back of my bag of flour. I managed to screw it up. I added far too much water. My bread was palatable but the crust was far too thick and the middle of the bread while cooked could never really dry out per se. I did this about ten times.

There where various reasons for my dough being too wet, one was that I used whole meal rye flour to make a few loaves. The flavor was phenomenal. Rye is sort of sticky and sucks up water. Pumpernickel is a good example of this; the bread is very wet and gummy. It is important to make understand the unique properties of the flour you are going to be using and keep it in mind when you bake or cook with the flour. As I said before I added too much water to my dough, simply because I didn’t know what consistency I was looking for. All the books I had read said my dough should be slightly sticky. I wasn’t sure what slightly sticky was. Maybe I feared dough that was too dry so overcompensated. I persevered; eventually I understood what consistency I was looking for.

I started to buy fresh yeast at my local health food store. I bought good quality strong white flour too. The fresh yeast really made a difference in the taste and texture of my breads. I also gave my breads a long time to ferment. This fermentation period was usually a 24 hours but you can store dough in your fridge for weeks for a truly complex artisan style loaf (The dough must be knocked down every couple of days and fed once a week). I bought some tiles and lined a baking sheet with them to simulate a baker’s oven. I found brand new tiles at the charity shop. It was very inexpensive.

This may seem like a lot of work. It isn't. Patience is all that is needed. I don’t have a bread machine or a mixer. It takes ten minutes to knead your loaf initially and five minute to knock it down after it doubles in size. I’m no expert baker but now I can make a pretty good loaf of bread. Since I've learned the basics I can be more creative too.


Country Loaf

Pre- heat oven 218

Pre-heated baking tray

Baking time 45-55 minutes

500 grams strong white flour plus some for kneading

1 teaspoon salt

1 half tablespoon fresh yeast mixed into a little warm water

1 tablespoon olive oil

Warm water, enough to make slightly sticky dough

I haven’t given the exact amount of water. Whenever I made bread previously, my inclination was to dump the entire amount into the bread, making for overly wet dough. It is important that you add salt to the mixture. Salt inhibits the yeast from growing too much. Mix the flour and salt together, add a little water and your yeast that was mixed with some water earlier. Keep adding water until sticky dough has formed add your oil now or later depending on your mood. Roll the dough onto a lightly floured surface. Knead for 7-10 minutes.


To know if the d
ough is sufficiently kneaded, place your hand flat on the top and leave for 5 seconds. Remove your hand; the dough should only
stick slightly to your hand and spring back like rubber. La Methode, Jaques Pepin


Pepin also states that the dough should already be forming bubbles and should be soft and shiny. Place the dough in a large bowl, cover with a lightly oiled plastic wrap. Let the dough rise for 1 and a half

hours or until it has doubled in volume. Knock it back. You can do a few

things. You can knead it for a few minutes, shape into a ball. Flour the surface

you are shaping the dough on. Make sure your dough isn’t sticky on the bottom. It should be floury. Flour the top of the loaf lightly, slash with a knife and bake on a preheated tray.You can knead the dough, shape into a ball it and let it rise for another hour or until it has doubled. Flour the

surface you are shaping the dough on. It may be a little tricky moving your dough (which has doubled in size) to your baking sheet. If this presents a problem make twoloaves of bread and bake until they both sound hollow. Many cooking supply shops have specialty bread tools available, like little bits of cloth that help loaves hold their shape etc. make sure your dough isn’t sticky on the bottom or it will be almost impossible for you to move your loaf cleanly. The work surface your dough is resting on should be floury. Flour the top of the loaf lightly, slash with a knife and then

bake on a preheated tray. This gives you lighter bread than the first option.

The third/ fourth options are longer fermentation times. The third option involves leaving the bread out over night

and knocking it down (after dough has doubled in volume)from time to time until you go to bed. The next morning knock down the bread, knead, shape into a ball and let rise one last time before baking on

a preheated tray (slash loaf with knife).

The fourth option is a long slow fermentation in the fridge. Knocking the bread when needed and when 3- 4 days have passed you take the bread out of the fridge to come to room temperature. When the bread has come to room temperature, knock, knead, shape into ball Flour the

surface you are shaping the dough on. Make sure your dough isn’t sticky on the bottom. It should be floury. Flour the top of the loaf lightly, let rise (1 hour), slash with knife and bake on a preheated tray. The photos are of bread I made using the third option.


To bake

Bake the bread for 45-55 minutes. Bake in a preheated oven. The bread is done when it sounds hollow when tapped on the bottom and top. Don’t eat the bread until it has cooled.


Monday, August 10, 2009

Greek Salad

Why can't you get a nice Greek salad in a restaurant in Ireland? It's easy to make. what's the problem? A good Greek salad is the essence of summer and it's so easy to prepare. Here's my recipe for a great Greek salad!!!!!!!!!!!!!! It is important to use a good full- fat feta cheese, good quality Kalamata olives and tomatoes.
Greek Salad

serves 4

6 or 7 plum tomatoes or equivalent cherry tomatoes chopped roughly (de-seeded if you prefer)

1 medium cucumber or 1 half large cucumber, seeded and peeled then sliced thinly in little crescent moon shapes.

1 medium red onion finely diced

150-200 grams Kalamata olives stoned

150-200 grams feta cheese

Dressing

1-2 tablespoons fresh lemon juice

1 clove of garlic finely chopped

half cup of extra virgin olive oil

one handful flat leaf parsley chopped

small handful fresh oregano finely chopped

a few sprigs of fresh thyme finely chopped

freshly ground black pepper to taste

Prepare the dressing first so it can macerate while you prepare the salad. To make any basic dressing you want the ratio to be, 1 part lemon or vinegar to 3 parts oil. Mix oil and lemon juice, garlic, herbs and pepper. In a separate bowl mix together chopped tomatoes, olives, sliced cucumbers, and finely chopped onion. Add dressing to coat salad and mix. Crumble feta over salad and stir through. Serve immediately.

Saturday, August 8, 2009

Piri Piri


I took this recipe from, At Home in Provence by Patricia Wells. This is an amazing book. I borrowed it from a friend about two years ago. I guess I've stolen it.Piri piri is a spicy oil, popular in France and posh pizzeria's the world over. Last year I made bottles of piri piri oil to give away as Christmas gifts. Seeing as I'd all these herbs lying around, I thought I'd make a bottle for myself. The oil can be as expensive or as frugal as you like, a simple garlic and chilli oil is terrific drizzled over pizza or added to tomato sauce.
Patricia's Recipe

1 tablespoon dried oregano

2 teaspoons crushed red pepper flakes or to taste or 12 dried bird peppers

1 teaspoon fennel seeds

4 sprigs of thyme

4 sprigs fresh rosemary

4 fresh bay leaves

250 ml olive oil or sunflower oil

In a sterilized bottle layer herbs and peppers. Cover with oil. Set aside to mature for one week atleast. If you are worried about the slight chance of botchulism leave the oil in youre fridge and let mature for one month. You can add the same mixture to red wine vinegar for piquant dressings.

You can add whatever you like, be creative, the recipe is just a jumping off point.


Lettuce Give Thanks


This spring I planted a variety of vegetables and herbs in my garden. I wasn't sure how to go about planting a garden. House plants under my care had never lived longer than six months, understandably, I was nervous. The first day we started digging the soil was incredibly rocky and a foot below the rocky soil, lay concrete. It was unfortunate, I had already surmised the inevitability of stony soil, all one has to do is look at the landscape of Connemara to know that big rocks and little rocks will play a starring role in, The Things That Annoy You About Gardening in Galway. The concrete was a bummer, I had hoped to grow kohlrabi, carrots and onions. My root veggie dreams were smashed between rocks and concrete. I soldiered on with lettuce, garlic and gooseberries.

I only found out last week, pretty much any idiot can throw down some seeds and they'll grow. All the gardening books I had read made me wonder how anything grew in the wild without the helping hand of man, between that and the plant hypochondria ... One gardening book in particular showed pictures of plants with various viruses, diseases, bugs and fungus. I was convinced my raspberries had some sort of virus. It was almost nice to of set actual hypochondria with this new plant one.
Last week I ate the first head of lettuce it was amazing, all that garden to fork crap is true. It felt great to make a bouquet garni from my herbs. If I were to buy the herbs at the shop it would have cost almost ten Euro to assemble. It was probably about twelve Euro to buy my herbs, pots and compost. I almost made my money back from one measly bouquet garni. I have enjoyed gardening, It wasn't nearly as time consuming or as hard as I had envisioned. I haven't mastered it by any means. But hey, any idiot can throw down some seeds and see what grows. It's brilliant!


Tuesday, July 21, 2009

Vegan Truffles


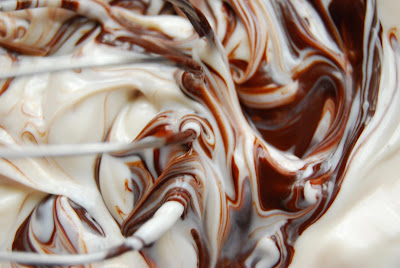
For the last two weeks I've been going chocolate crazy. Generally speaking this is a winter problem for me. Every single day, from the end of November until the beginning of April I eat a one hundred gram bar of 70% + chocolate. As a kid I wasn't too gone on chocolate. Hershey's candy bars are horrible. They have a distinct poo smell, honestly they really do, it put me off. My chocolate consumption goes way up during the winter, maybe I need more vitamin D. The weather hasn't been great so maybe I need some sun. A friend of mine told me, her husband is vegan, and trying to impress her, I said that I had a vegan truffle recipe. I did, however, I had completely forgotten it. As a result, I've spent many hours toiling over this recipe. Often desserts that include soy products (other than the milk) taste way too soyish. I have seen other recipes for vegan truffles that use only cocoa powder and agave syrup or cocoa powder and vegan spread and they aren't sinful enough. Truffles are so easy to make, unless you're one of those people who wants to be a home chocolatier, tempering your chocolate etc. The truffle mix or ganache can be used as a yummy frosting on cakes, or you can pipe the ganache into cooked pastry cases for chocolate tarts. I like to have a jam jar filled with ganache in the fridge, when people come over you can set out chopped nuts, coconut, toasted oats, or chocolate powder and everyone can dip spoons full of ganache into whichever coating they like. I'm saying this like I do it the whole time, sometimes I do, more often than not I eat spoonsful of the stuff straight from the fridge.

About six months ago on one of my jaunts to the health food shop I noticed soy cream and soy whipping cream. I go to the health food shop for sort of new age snake oil merchant gear like; Honeygar, that crap. Biweekly I convince myself that something I've read in Heat magazine or in Wikipedia is the answer to what ails me. I find myself at Healthwise up to my elbows in lentils, and the next thing I know I've just spent thirty Euro on soysages and a home sprouting kit. I really love health food junk food So bad for you but you can talk yourself into believing it's healthy, yummy lies!!!!Anyways, I saw the soy cream and bought it. It's really good and truly sinful. I have two different recipes for vegan truffles. All the ingredients should be readily available at the health food shop.

Two Ingredient Truffles


200ml soy whipping cream (Grano Vita make soy whipping cream)

100 grams of 60% + vegan chocolate


Cut open your (room temperature) whipping cream before you start. They can be pretty tricky to open. Chop up the chocolate and melt over a double boiler. When the chocolate is melted take off the heat and add the whipping cream. Stir until mixed. Taste, if the ganache isnt sweet enough you can add some agave syrup or maple syrup to sweeten. Put the mixture into a container and refrigerate for 3+ hours. When the ganache is thick and cold you can spoon it into little balls and cover with whatever you fancy. This recipe is good, however, it is soyish.

Orange and Coffee Vegan Truffles

200 gms Orange vegan chocolate chopped (a few drops of orange oil would suffice if this chocolate is unavailable)

200ml Soy pouring cream (Provamil make soy pouring cream, soy whipping cream should work too) room temp

100gms vegan spread

1-2 shots espresso cooled

Melt chocolate over double boiler. When melted, remove from heat and stirrin cream, espresso, and spread. Refridgerate for three hours+ or until firm.


Tuesday, July 14, 2009

Spanish Hot Chocolate

I've been craving hot chocolate for the last few days. It's such a winter drink and alas, the weather here in Galway hasn't been great. This Baltic weather has made me pine for the Chocolate Museum in Barcelona. One should never, never, pay to enter the Chocolate Museum.

When mentioned, chocolate museum, for most of us the possibilities are infinite. I imagined the tiredest of scenarios, Willy Wonka's little factory. Because of my inability to think of anything other than that beauty of a factory, I was probably the most upset upon entering. Our pamphlet clearly stated that there were statues, buildings and historical figures made from chocolate. Upon inspection these things could have been made from chocolate, but not recently. They looked as if they were made from cardboard, dust and the mud Native Americans used to build their homes in the desert thousands of years ago. Dermot was enthralled by the dust, the passionless plaques and the durability of the chocolate statues and buildings behind the shiny glass. Everyone else in the one-roomed museum was trying to make the best of it. "We already paid we might as well mill around aimlessly," I imagined they were thinking. The duped moved about assessing each figure and plaque listlessly. They tried to watch the ten minute film, no one could stick it out. Too depressing.... Was it directed by Ingmar Bergman? Whoever it was, had a real knack for sucking the fun out of chocolate. One assumes this special knack was explicitly cited in the wanted adds for jobs linked with the museum. This place was an ode to Chocolate's blue period or perhaps an homage to when Woody Allen stopped being funny. Maybe the curator thought we'd all been laughing at Chocolate for too long. Didn't anyone know Chocolate had a serious side? Didn't we know Chocolate could be molded into Christopher Columbus's head? Didn't we know that Chocolate was a great material to make a diorama with.
No, we didn't.
Dermot and I shuffled out of the museum into the cafe adjacent. On the counter sat this big thing filled with thick chocolaty, gooey unctuousness. I looked at the menu board. It said hot chocolate, I put two and two together. It was the nicest hot chocolate I'd ever had. The cocoa was as dark as ganache and thick like cold pouring cream. I knew Dermot and I would be back the next day for another. It was the Chocolate I knew, the funny Woody Allen, an ode to Picasso's rose period. Frankly, a much happier chocolate. Not depressed like the stuff in the museum and not self-destructive like the Mars Bars Dermot eats. You know, the kind of chocolate that stays up all night doing shots of tequila and picks fights with dudes twice your size and hits on your girlfriend.
This cocoa was the fun stuff.

Spanish Hot Chocolate

1 cup milk or soy if you're like me

2 1/2 oz dark chocolate 70%, or 2 oz bittersweet chocolate (not unsweetened), broken into pieces

2 teaspoons of sugar sugar or the sweetness you prefer

plus 1 1/2 teaspoons cornstarch

Bring milk to the boil. Whisk in cornstarch and sugar and keep whisking until mixture thickens to desired consistency. Take the milk off the heat. Whisk in Chocolate pieces. Serve. If the mixture is a little lumpy sieve and then serve.

Thursday, July 9, 2009

Beetroot


I was at Bentley's on Sunday. It was the only late bar in Limerick that happened to be free in. It was like an airport hotel inside, it should be called Riff Raff's. We were up for a friends birthday which coincided with Indie Week Band Competition. Some other friends had won the previous year, they're called Walter Mitty and the Realists. Anyway, we were all at Bentley's, plus some Canadian band and I was telling everyone about how I had some beetroot during the week and how the day after my life flashed before my eyes when I momentarily thought I had bowel cancer, then realized it was beetroot. Everyone had a red food poo story or similar. Pretty rock 'n' roll. Almost everyone at the table was anti-beetroot. We are so used to pickled beets which are pretty muddy in taste, more akin to bottom feeding fish in flavor than anything worth eating. However, fresh beetroot is a revelation, earthy rather than swampy. Eaten raw, they sing on the salad plate and roasted they ooze sticky sweetness. Just don't forget you've eaten them!


Sunday, June 28, 2009

Lovage, Raspberry, and Elderflower tonic

After trying lovage for the first time last week, I was interested in trying lovage with something sweeter than pea soup. I don't know the exact amounts I used so this is just a rough guide. Be sure not to use too much lovage as it has a very strong flavor. If you were to make a large jug of this tonic, two to three lovage leaves are all that are needed. Elderflower tonic is sold in most health food shops. Other high quality cordials can be substituted if elderflower is unavailable.

For this tonic you will need:

Fresh or frozen raspberries

Lovage leaves or mint if lovage is unavailable

Elderflower tonic

Ice

Fresh lemons

Vodka optional

Soda water

In a large jug mix fresh or frozen raspberries, elderflower cordial, chopped lovage, ice, some fresh lemon juice and vodka (if using) to taste. Add cold soda water and taste. If more sweetness etc. is needed add to taste.


Wednesday, June 24, 2009

Lovage

I recently bought The River Cottage Cookbook at a charity shop. One of the first recipes I tried was the pea, lettuce and lovage soup. Lovage is pretty hard to come by. I remembered seeing the stuff previously at one of the veggie stalls at the farmer's market. However, I had never used lovage. I assumed it was more of a medicinal herb rather than a culinary one. Boy was I wrong, Hugh Fearnley-Whittingstall describes the taste and smell of lovage in his book as 'curryish.' When I got home from the market I excitedly opened the bag to get the inside scoop on lovage. The scent that rose up from this crumpled little bag was astounding. I made Dermot take a drag of the heady herb. He was just as amazed as I. Yes, it is 'curryish' and so much more. If you see lovage, buy it, the scent alone will inspire you. Whittingstall, points out that only a little lovage is needed to cook with, as it is so potent in scent. The recipe below is verbatim from The River Cottage Cookbook. You can eat this soup hot or cold. I added cream to my soup before serving cold. It was really good and inexpensive to make.
Pea, Lettuce and Lovage Soup

1 medium onion

a little butter or olive oil

500 grams or 1 pound fresh or frozen peas shelled

1 small Cos or Romaine lettuce, or 2 Little Gems, shredded

700 ml good chicken or vegetable stock

5-6 lovage leaves, plus 4 to garnish

salt and pepper

Dash of cream optional

Serves 4

Sweat onion in oil or butter until soft, then add peas and lettuce. Pour over the stock, bring to boil and simmer gently for 4-6 minutes until peas are completely tender. Remove from the heat and add lovage leaves, then blend the soup with an immersion blender. Stop blending when you are happy with the texture. If you like smooth soup blend away, if you like thick chunky soup stop when you reach the desired consistency.
To serve cold, chill in the fridge. To serve hot, reheat stirring occasionally, but do not allow to boil. season to taste, then pour in to individual bowls and garnish with a single lovage leaf.

Monday, June 22, 2009

Broad bean, tomato and mozzarella salad

On Saturday I bought fresh broad beans and by today I still hadn't used them. I decided to make a summery Italian style dish. To prepare broad beans, shell and boil for one to three minutes depending on how large the beans are. I over cooked mine slightly they were still yummy. I tossed the beans with extra virgin olive oil,one finely chopped clove of garlic, salt, pepper, and a squeeze of lemon.

I seeded two tomatoes and diced them, and roughly tore up fresh mozzarella and added the veg and cheese to the broad bean mixture.
You must use good mozzarella. I added a chopped handful of fresh oregano to finish the salad off. Let the salad sit for an hour to macerate in the mixture and then enjoy.

mozzerella

Samphire

Last week while at the fish mongers, I noticed they had some samphire for sale. This was pretty exciting for me, as I had only come across the sea vegetable once before. This tidal plant is seriously delicious. It's very simple to make too. I have read on more than one occasion that samphire is similar to asparagus in texture and taste. I don't agree with this, it is salty and fresh like the ocean, and arguably better than asparagus. If you see it you must try it. I bought a little less than a pound for about four Euro, not to too spendy. If you know where to pick these guys in Ireland, tell me. I would be forever in your debt.

In the River Cottage Cookbook, Whittingstall explains that samphire is picked until the end of August and that the vegetable becomes fiberous and woody after flowering (in August.) To prepare pick over, clip off the ends of the stalks on larger plants, wash, boil until al dente and serve with melted butter. Samphire is an amazing accompanyment to fish.


Sunday, June 14, 2009

Refried Perfection

I love refried beans. Of late, I have been following The Homesick Texan's blog. She talks a lot about lard. She cooks a lot with lard. In fact, she raves about the stuff. As children, we were told lard was evil, terrible, it was horrible stuff. I remember the same said about butter, however, I also remember mothers, grandmothers etc. pooh poohing margarine when baking. Butter was the only way. Thanksgiving and Christmas were special in part because we got real butter on our spuds instead of margarine. The Homesick Texan was the first person I'd heard say, 'lard is good.' I was curious and the gods of lard were listening. On Friday, I stumbled on to the lard section in Tesco's. It was the perfect price too, 30 cent a go.
Authentic refried beans are supposed to be made with lard. I have been searching for the perfect refried recipe for literally years. Until today I had never made beans with lard. I've used butter (yum) olive oil, sunflower oil, bacon fat and the list goes on. Truthfully, I enjoy butter the most. Pinto beans are quite neutral. Most beans seem to be. You can really taste the butter in the refried beans and I really like that. Vegan versions are very tasty too, oil can be substituted easily and the results are delicious. As far as lard is concerned, my partner loves beans fried in them. Lard seems to be neutral in flavor and I didn't feel that it lent the beans any special texture or flavor. They were really nice, but I still don't have my dream beans. This hasn't put me off lard though. I've only begun.

I don't have a definitive recipe for beans, like I said before. I'm going to write down the ingredients and if you wish to make these beans you'll have to do everything to your own taste, and the volume you require.

Ingredients

Dry pinto beans or whichever beans you prefer

1 tablespoon baking soda

Half an onion

Cumin

Garlic

Bay leaf

Salt and pepper

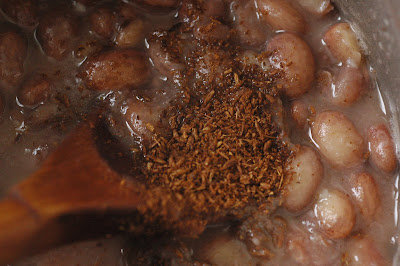
Soak your beans overnight in water and 1 tablespoon of baking soda. Alternately, soak beans in water that has been brought to the boil plus 1 tablespoon of baking soda (then taken off the heat) for an hour. When you are ready to cook your beans rinse them thoroughly, or they will taste of baking soda. Fill a pot with water and your beans put on the hob uncovered with bay, garlic and half an onion. . DO NOT add salt to the pot!!!!!! Your beans will never get soft. Cook at med-med low for about an hour and then rinse beans again. Add new water to the pot. The amount depends on how done your beans are. If your beans are soft, just cover with water. If your beans are hard more water is needed. When your beans are soft and the water has mostly evaporated as pictured above mash the beans with a fork as little or as much as you would like. Toast your cumin and grind into a powder. Add the cumin, lard, salt and pepper to your beans to taste. Enjoy!!!!!!


Friday, June 12, 2009

Rule 1 of the Big Fat Food Manifesto

Garlic is King !!!!!!!!!!!!!!
The Irish tend to disagree with my sentiments. Although, they really love their garlic chip and cheese (who wouldn't?) My partner is not a fan of garlic, nor is he a fan or the ubiquitous garlic chip and cheese. The thing about garlic is it adds so much depth to food. Just because it isn't slapping you in face doesn't mean it isn't there. Too many times I have made soups, stews, sauces etc. and forgotten to throw in a clove or seven into the mix. The results are mediocre not great. Something is missing and the answer torments me all night until finally, I awaken at four a.m. GARLIC, damn!!!!
Garlic and I were always friends. We fell in love when I was a teen, my friends and I used to go to the Westmark Hotel for appetizers. The height of sophistication. We always got baked Brie and roasted garlic. We probably imagined ourselves as the horsey type, just back from polo or something. At least Gore Vidal could sneer at our longing for this rich waspy lifestyle. I love retro food, I've never managed to try aspic, maybe it could be my Everest. I digress, the salty creamy cheese and the sweet smoky garlic were so amazing together. I really loved the stuff, I still do. It's so easy to make and my staunchly anti-garlic partner loves the stuff too. If the staunchest of the anti-garlic movement can be swayed...
2 large heads of garlic

2 t olive oil

1/2 t salt

8 oz whole wheel of
brie

crusty bread


Remove all but one layer of husks from the garlic (don’t separate into cloves). Place in small baking dish, drizzle with olive oil and sprinkle with salt. Bake covered in 350 degree oven until very tender, 75 to 90 minutes.

Score the brie and place in a shallow baking dish. Grill until brown and bubbly, 5 to 7 minutes. Meanwhile, slice the bread.

Serve cheese while hot with the garlic and bread. Squeeze a clove or two of soft roasted garlic on a slice of bread, spread with a little melted cheese. Yummy.


Thursday, June 11, 2009

Courgettes and Garlic

Last night I was watching a cooking show. It was Trish's fancy French stuff or something. This recipe seemed kind of unappealing but I felt like I need a new cold dish for my repertoire. I was pleasantly surprised by the results.
Recipe for Courgettes and Garlic

2 courgettes

1 head of garlic

1 tablespoon fresh thyme or to taste

juice of 1 lemon

extra virgin olive oil to taste

salt and freshly cracked pepper

Trish added Parmesan, I omitted that ingredient.
This recipe is pretty straight forward. Wash, top and tail courgettes. Pull apart garlic, but keep them in their skins. Boil courgettes and garlic in hot water for ten or so minutes. When the veg and garlic are tender, take them out of the pot and set on a towel to dry. Squeeze the cloves of garlic from their skins and mash them together with a little olive oil, salt and pepper. When the courgettes are cool enough cut into thirds or halves or if you're feeling pretty out there, quarter them length ways. If you have a large enough plate you can lie all the courgettes (I would only halve the courgettes length ways then) out and top evenly with the mashed garlic mixture. Then drizzle with lemon juice and olive oil. Sprinkle with salt, pepper and fresh thyme. If you're like me, you may have to stack the courgettes lasagna style on to a smaller plate.